The drawback of Cutting Planner is that data entry is cumbersome. To facilitate data transfer from other software, such as inventory data and drawings...

For first-time users, we’ll walk you through the steps starting from Step 1. A more detailed explanation of all features can be found in the submenu.
This software runs on PCs with Windows 11.
You can try it for free for 30 days only during the initial installation. There are virtually no functional restrictions during the trial period.
Upgrades are free. Click here to purchase.
Please agree to the End User License Agreement and Privacy Policy.
[Worksheet] > [Sheet Properties] or [Worksheet] > [Add Sheet]
If data has already been entered, you cannot switch between 1D and 2D modes. Either delete all the data, or use [Worksheet] > [Add Sheet] and [Delete Sheet] to manage this.
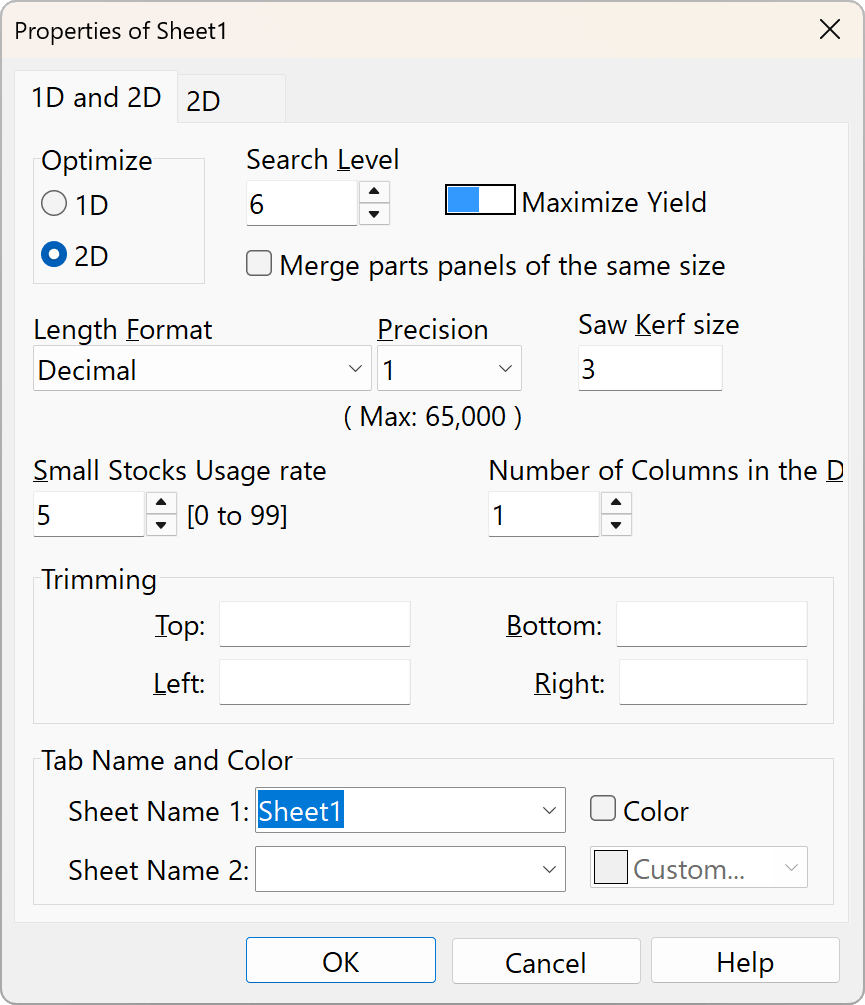
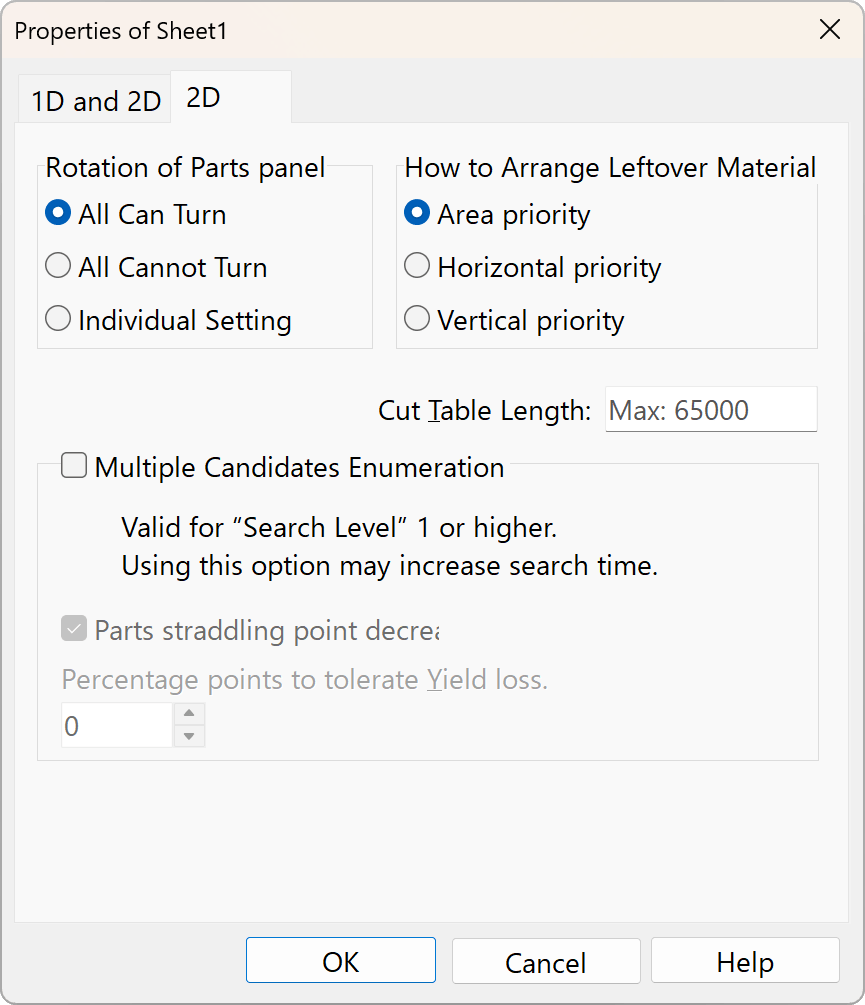
Specify whether the orientation of the part panels can be changed. For materials with a grain direction that cannot be altered, select “All Disabled.” See “For Materials with a Grain Direction” below. If you select “Set Individually,” checkboxes will appear in the part panel list. Please note that once you change this setting via “Set Individually,” you cannot revert it.
Use the edges of the Source panel to specify the area where you do not want to place the Parts panel.
Specify the cutting width of the saw. Set to 0 for shearing.
Configure layout calculation options, such as the "Search level" (balance between search time and optimization).
See the link below.
1D / 2D Tab
2D Tab
Multiple Candidates enumeration Tab
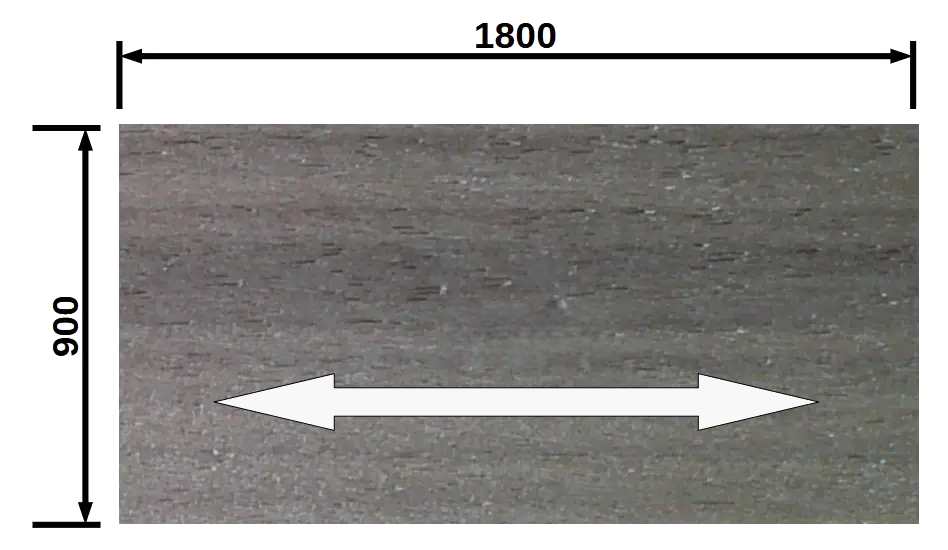
For patterns with a grain direction on the sheet material, enter the value corresponding to that direction as the “Width.”
In the example shown in the figure, set Width=1800 and Height=900, and enter data with the grain direction consistent for both the Parts Panel and the Source Panel. Then, by setting “Parts Panel Rotation” in the “Sheet Properties” section to “All Disabled,” you can arrange the parts with the wood grain aligned.
Under [Options] > [General] > [Size Order], you can choose between “Width * Height” or “Height * Width” for how two-dimensional sizes are displayed throughout the app.
Unless otherwise specified, the app\'s help documentation assumes the “Width * Height” format.
This setting affects input and output in CSV format.
You can create up to three description columns in the sheet properties. However, please note that the number of columns may change when working with CSV data.
For the Source Panel, if left blank, the quantity is considered unlimited.
For the “Parts Panel List” and “First Usage Stocks List,” if left blank, the quantity is considered 1.
Normally, you would use only the top field and not this one. If multiple types of source panels exist in the top field, the system automatically assigns each part panel to the appropriate source panel for maximum efficiency. However, by registering materials you want to use first under “First Usage Stocks,” the system will prioritize consuming them first, starting with the smallest pieces. Therefore, if you use only this field and not the top one, the priority system becomes meaningless, resulting in reduced efficiency.
This feature is intended for registering materials you do not want to keep in inventory, such as scrap.
However, even for scrap, if the pieces are relatively large or if it is acceptable to save them for later use, you may choose to place them in the source panel list instead.
This feature allows you to prioritize inventory reduction as well as yield optimization.
[Sheet Properties] - [Maximize Yield / Minimize Cost]
If you select "Minimize Cost" in the Sheet Properties, the optimization calculation will be based on the price entered here. In that case, you need to set the unit price for all items in this list.
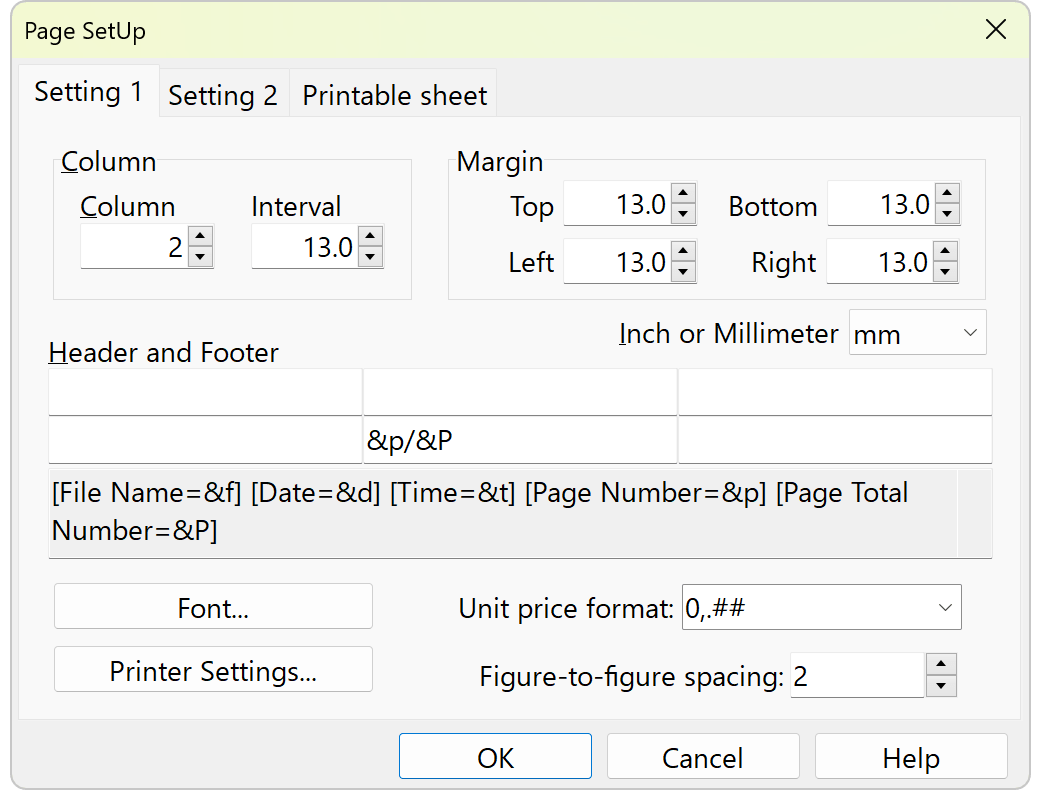
[Page Setup] - [Setting 2] - [Show Unit Price]
If you select the [Show Unit Price] option for printing, the unit price of the parts panel will be calculated when printing.
[Tools]-[Options] See the link provided.
View
Layout Pictures
List of Tab Name candidates
General
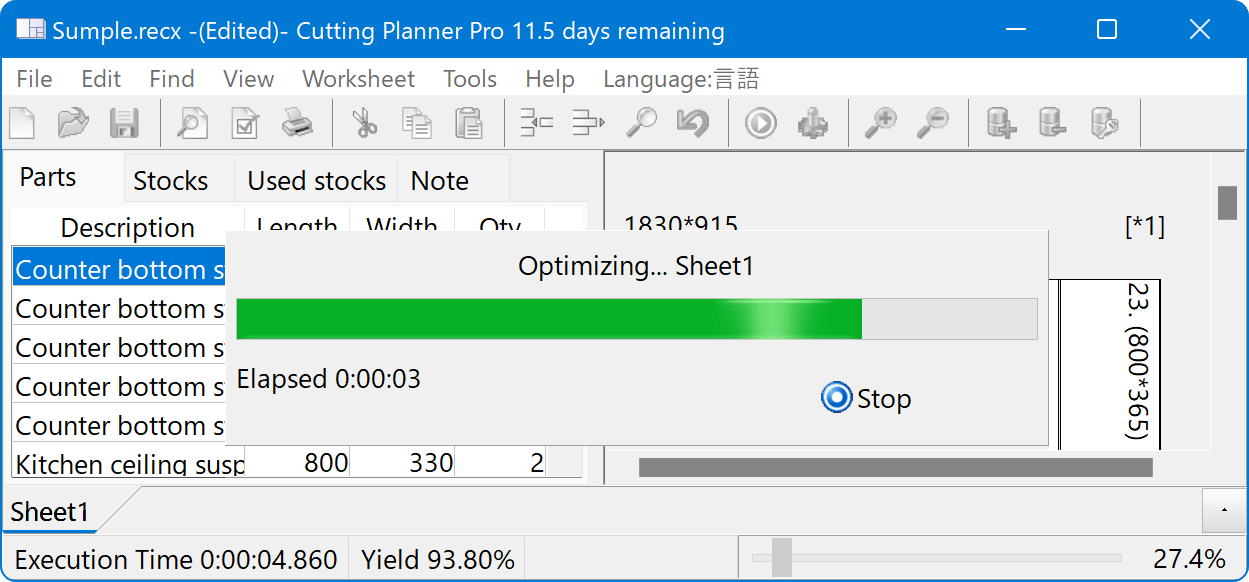
[Tools]-[Optimization Calculation]
The "Force Quit" button displays the best results found so far. If no results have been found yet, no results will be displayed.
Worksheets that have already been calculated will not be recalculated. If necessary, recalculate using [Tools]-[Recalculation].
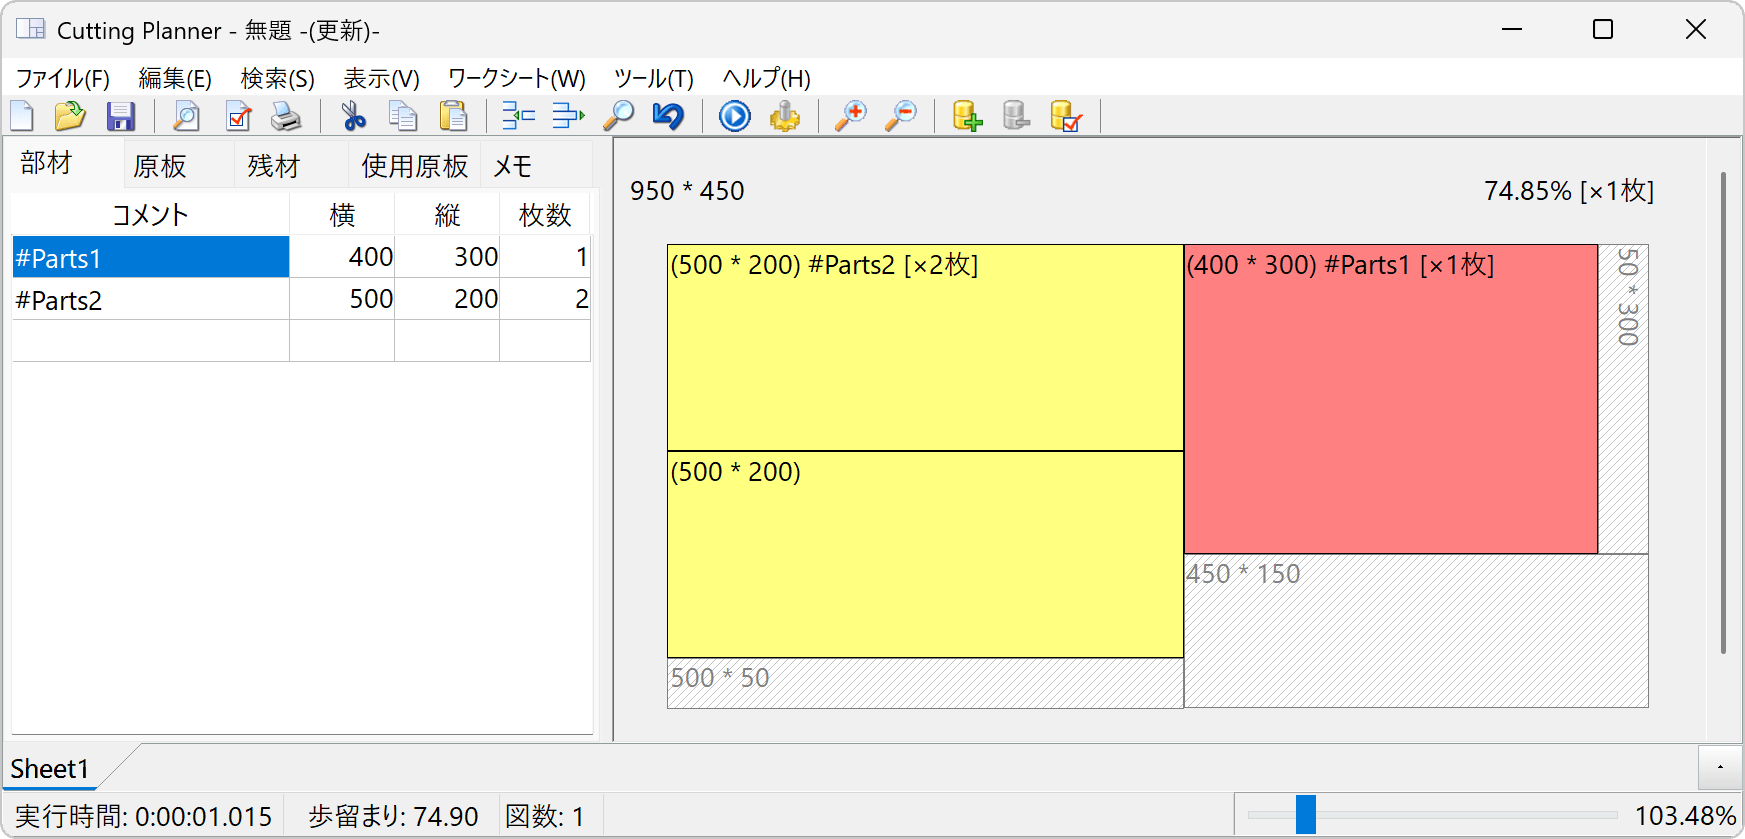
Outputs up to two types of optimization results simultaneously: "Prioritize Number of Processes" and "Prioritize Remaining Material Length." Switch between them using the toggle switch in the upper right. If only one result is available, it will be displayed in a grayed-out color. The quantity of source panels used remains the same for both options.
Outputs multiple placement candidates when [Sheet Properties]-[Multiple Candidate Enumeration] is specified.
See the link for details.
If the length format is decimal, an 1800*900 image will be rendered at 1800*900 pixels when zoomed to 100%.
If the length format is feet/inches, it will follow the Windows scaling settings.
This displays a list of leftover materials sorted by area.
You can remove excessively small scraps from the list by going to [Options]-[View]-[Show Scrap List].
This displays the number of source panels used.
This tab appears if there are parts panels that could not be placed, such as insufficient quantity in the source panel.
See the links
Optimization results can be saved in .recx format. While .recx is a minor, proprietary format, its specifications are publicly available, allowing for the development of custom software to integrate with other programs.
(See .recx file specifications)
Data loading and output can be automated using command-line options.
Exporting in CSV format and saving figures in EMF format are supported via the right-click menu.