Options - Layout Pictures
[Tool]-[Options]-[Layout Pictures]
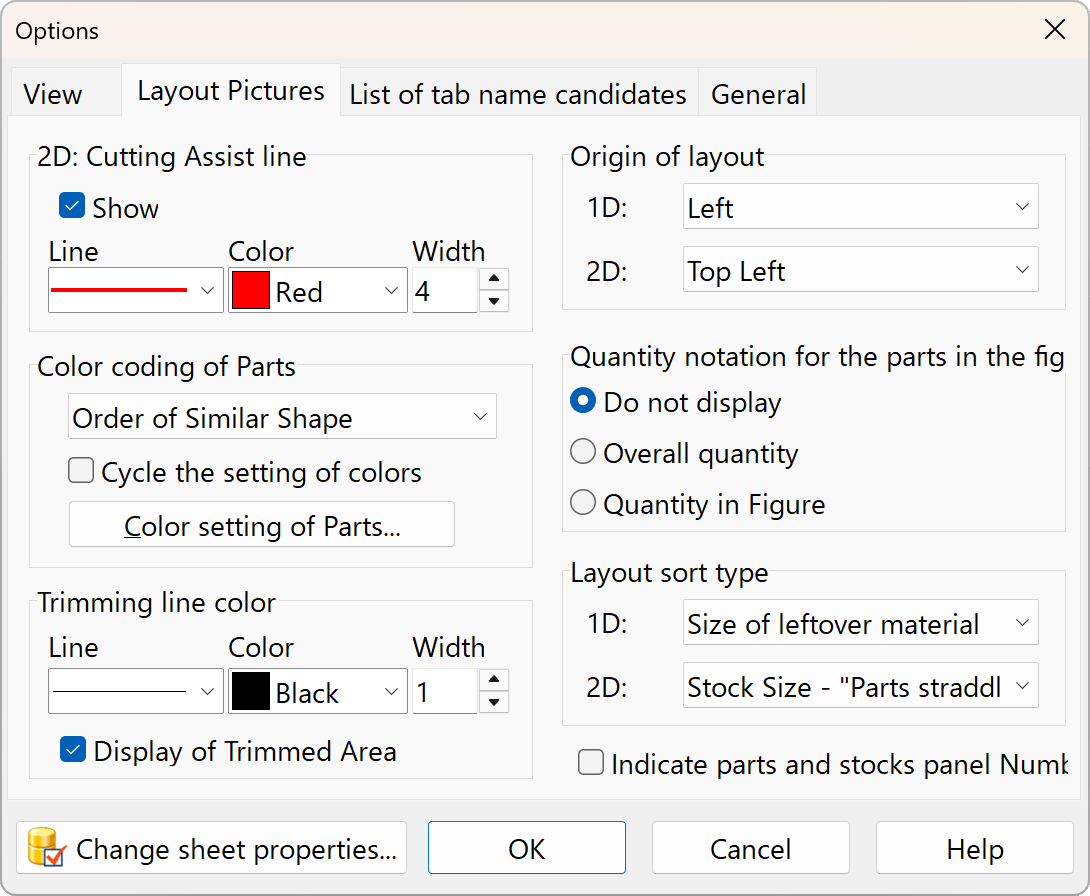
2D: Cutting Assist line
Displaying this makes it easier to see where the board will be cut. It may not be displayed for simple patterns.
Orighin of Layout
Specify which side to align the parts panel on. The layout remains the same, but the orientation of the cutting pattern changes.
Color coding of Parts
Configure color coding for each part panel. Determine the priority order when the number of available colors is insufficient for the number of components.
The “Prioritize Similar Shapes” option prevents operator errors by prioritizing color coding for components that are nearly the same size.
Color setting of Parts
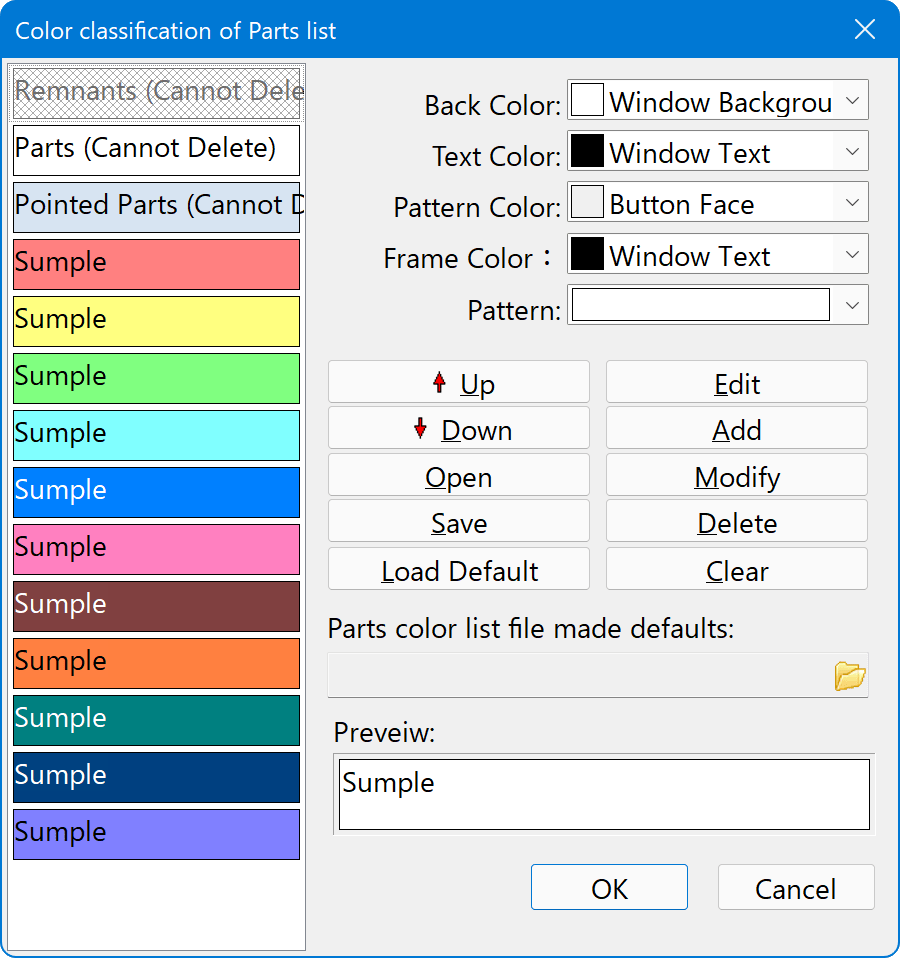
The top three items on the list are standard color settings and cannot be deleted.
How to Change Colors
- Select the color list on the left.
- Change the color and other settings in the list box at the top right.
- Click the "OK" button.
To change the default settings at startup
- Click the Save button to save the color settings to a file.
- Specify the file under “Specify the component color list file to use as the default”.
If you leave this field blank, the settings will revert to those from when the app was installed.
Quantity notation for each part in the figure
Specify whether the quantity displayed on the component in the drawing refers to the total quantity or the quantity shown in the drawing only.
The number of patterns matching the one shown in the figure is displayed in the upper-right corner of the figure. If you select “Quantity in Figure,” the actual amount required for the cutting process will be the number of sheets multiplied by that quantity.
Trimming line color
Display of trimmed Area
If you uncheck this box, the image will be displayed with any cropped areas omitted.
Layout sort type
1D
- Size of leftover metalial
I\'ll start by arranging the diagrams with the highest yield. - Parts Size
Rather than simply prioritizing yield, the parts are ranked based on a weighting system that favors larger pieces. The reasoning behind this is that, in the event of a cutting error, starting with the larger pieces increases the likelihood of being able to repurpose the leftover material for smaller parts, thereby minimizing waste. - Count of Layout
Sort the figures by the number of cuts in the same pattern, from highest to lowest.
2D
- Stock size - Parts straddl point
Start by arranging the drawings with the largest original sizes. Arrange drawings of the same size in order of decreasing “Parts straddle points.” - Parts straddl point
Sort the parts in descending order of the number of “straddle points.” If there are multiple board sizes, drawings of different sizes may appear in the middle of the list.
View parts and stocks panel Number
Displays the numbers automatically assigned to the Parts panel and Inventory panel. If a description is too long to fit within the part in the drawing, this number may appear even if this checkbox is unchecked. This setting also applies when printing.